Tuesday, February 8, 2011

Lilacs in February Baby Blanket

Lilacs in February Baby Blanket


This is a very easy pattern, suitable for an advanced beginner.  The hardest parts of it are evenly single crocheting along the sides for the first round of the border, and the reverse HDC round that finishes it.

Materials:
WW yarn 16 oz  (I used a Caron pounder in lilac, and only had about 5 yards of yarn left so you may need more.)
K hook
Yarn needle for weaving in ends

Special stitch:
Cluster (worked over two stitches) – yarn over hook, insert hook in first stitch, pull up loop,  yarn over hook again, insert hook in next stitch, pull up loop, yarn over hook and pull through all 5 loops on hook-1 cluster stitch made

Abbreviations:
Ch - -chain
Sc – single crochet
Dc – double crochet
Ss – slip stitch
Hdc – half double crochet

Note:
Pattern works on any even number of stitches, so you can make a blanket of any size.  You could also make a scarf or a rectangular shawl from this pattern.

Gauge:
Unimportant.
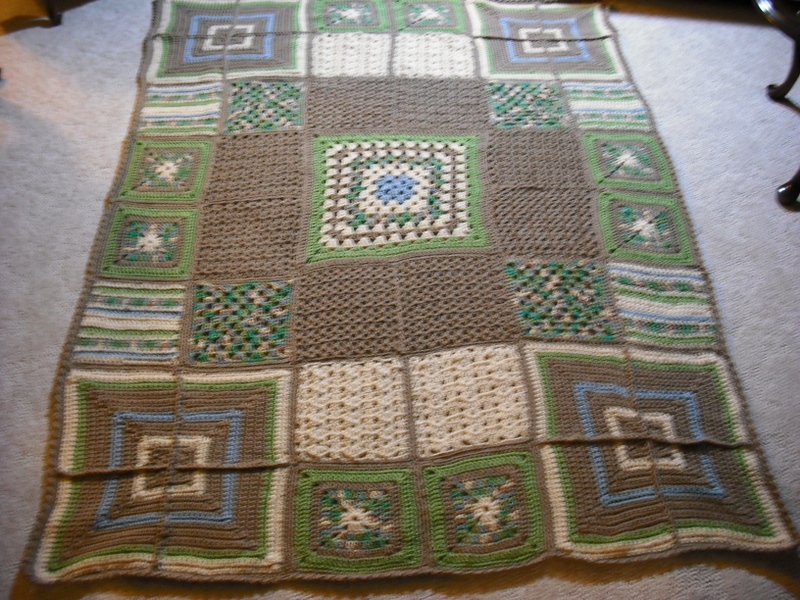
My blanket is 36 inches square

Pattern:
Chain 85.
Row 1:  Sc into second chain from hook and into each chain to the end (84 sc)
Alternatively, you could foundation single crochet 84 stitches.
Row 2:  Ch 2, turn, DC into next stitch, * cluster over next 2 stitches, ch 1 *, repeat from * to * until you have two stitches left, DC into the last two stitches  (84 stitches)
Row 3:  ch 1, turn,  sc into each double crochet, into the top of each cluster and into every chain stitch  across (84 sc)

Repeat rows 2 and 3 for a total of 73 rows.  End with row 3.

Do not finish off.  Work border as follows.


Border:
Round 1:  Ch 1, and do a round of sc around the entire afghan, placing 84 sc down each side and across top and bottom, and 3 sc into each corner.  Join with a ss to beginning sc.
Don’t get too hung up on getting the stitch count exactly right.  As long as you have an even number of stitches the pattern will work out. And if despite your best efforts, you happen to miscount and end up with an extra stitch, you can still make it work out.


Round 2:  (work loosely)  SS to corner stitch, ch 2, dc into same stitch, ch 1 and work 2 more dc’s into the same stitch, * cluster stitch worked over next two stitches, ch 1 *, repeat from * to * until you get to the next corner, into next corner stitch work 8 2 DC, ch 1, 2 DC *, all into the same corner stitch, and then continue with cluster stitch, ch 1 down the next side.  Repeat around until you get to the beginning ch 2.  Join with ss. 
Note:  If you ended up miscounting and end up with an extra stitch, just skip a stitch in the middle of a cluster stitch.  It will barely show in the finished blanket, and it’s a lot easier than ripping out what you’ve already accomplished.

Round 2 makes a series of eyelets that you could weave a ribbon through if you were so inclined.

Round 3:  Reverse HDC row

If you’ve never done this before it might take a bit of trying to get it, but once you do, you’ll be happy you did.  This stitch makes an edge that looks a little like a twisted rope.  I use it a lot for afghans, because I think it really makes the project.  If you don’t want to bother, there’s nothing wrong with another row of SC to finish. 
And I suppose if you are a glutton for punishment, you could do reverse sc. That just means you sc in every stitch, but you work backwards.  It’s a lot harder on your hands and takes a lot longer than the reverse HDC, but it also looks really nice.

As you might expect from the name, reverse HDC is worked in the opposite direction that you would usually work in, from left to right, rather than from right to left.  (I’m right handed, I’m not sure what direction a left handed crocheter would ordinarily work in)

And finally, here’s how to work the stitch, remember to work in the “wrong” direction:

To start: ch 2,  HDC into the first ch 1 space, (which should be before a cluster), ch 1, HDC into next ch 1 space.  Continue across, working a HDC into each ch 1 space, with a ch 1 between each HDC.  When you get to the corner, work a HDC into each DC, skipping the ch 1 in between the two sets of DEC’s. (4 HDC’s going around each corner)  Continue around until you get to where you started.  Join to the beginning ch 2.  I usually pull the yarn through a stitch, rather than slip stitching.  Whatever looks best to you is fine.

Cut yarn and weave in ends.


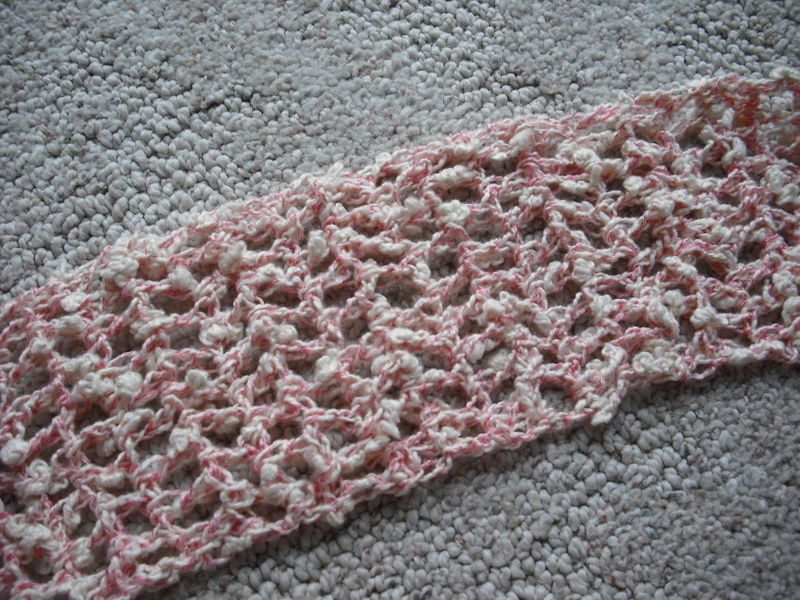
Essentially reverse HDC is just a  series of  * HDC, ch 1 * worked backwards.  Each new HDC twists around the last set of stitches, creating a twisted looking border.  Rather than “standing up” the HDCs are “laying down” along the edge of the blanket.  I find that it sometimes takes a little finagling to make the corners look nice.  In this case I did a HDC into each of the 4 DC’s in the corners, and skipped the ch 1 in the middle of the DC’s.  This picture will give you an idea of what the reverse HDC edge looks like.


Note:  Pattern is untested, except by myself. Please let me know if something is unclear, or you find a mistake.
You may sell one or two items made from this pattern, but you may not sell the pattern or publish it anywhere else. Please link to the pattern if you post a picture elsewhere.


Thursday, February 3, 2011

I've finished one of my WIPS

I finally finished the Bernat mystery afghan today.  I have to say honestly that I don't like it at all.  I don't think that the pattern is at all worthy of a professional designer (or at least I assume that Bernat has professional designers).  If I were a beginner crocheter and tried this as one of my first projects, I'd choose another craft. However, here it is.  My photograph is worse than usual, but my subject isn't all that great either.


Wednesday, February 2, 2011

Snow-Snow-Snow!!

According to the news stations around here, the snowstorm we had last night and this morning, was record breaking.  Now, evidently, they only meant record breaking for Feb 2nd.  Apparently the record is some paltry bit of snow, 2.1 inches, is what I heard on one station.  Never-the-less, we got a lot of snow in the past 24 hours.  I'd guess its somewhere between 15 and 18 inches, on top of what we already had.
  Looking out the front door
 Snow piled on the table on the back deck
This last picture is our front yard, taken from the family room window.

Once it stopped snowing, the sun came out and it was bright and cheerful.  And this evening, when I decided to take these pictures, I noticed the end of a pretty sunset.  It's hard to believe that in only a few months, it will be spring, and pretty soon, I'll be complaining about the heat!

Saturday, January 22, 2011

January Snowday Scarf

Updated Sept, 2014

January Snowday Scarf PDF

This is another very easy beginner friendly pattern.  It can be made to any length and width, so this pattern would work for an afghan, a shawl, or a baby blanket as well.

Ordinarily I wouldn’t make a scarf that is worked lengthwise, because I hate working into a long chain.  I saw a scarf pattern that I really liked, started it, and lost the pattern.  It seemed a shame to frog what I had already done, so I decided to see what I could come up with.  This is the result.

My scarf is about 6.5 inches wide and 84 inches long.

Materials needed:
WW yarn – I started with a 10 oz skein of Bernat Rainbow Dreams, and had some left over.  I’d estimate that I used between 7 and 8 ounces of yarn.
K hook
Yarn needle to weave in ends

Of course you could use any yarn with an appropriately sized hook.  I used a larger hook than I might ordinarily use with WW yarn, because I wanted the resulting scarf to drape nicely.  If I was making a blanket, I probably would have used an I or a J hook.
You can easily adjust the length of this scarf by changing the number of stitches in the beginning chain or foundation row.

Stitches used:
Foundation single crochet (optional) - FDC
Ch - chain
Single crochet - SC
Double crochet - DC

Special stitch:  shell = 3 DC into same stitch

Notes: 

This scarf is worked back and forth in long rows. It has nice straight edges and square corners.  (my picture taking skills don’t really reflect this very well.)

 I have not yet tried it as a scarf worked in short rows, but it should work.  Just start with a smaller beginning row, say something like 26 or 30 single crochet stitches in row 1, depending on the width you want.  I do not think it will drape as nicely made this way.

Beginning ch 2,  (turning chain), counts as the first DC of each row.  I like to use a chain 2 to represent a double crochet, but a lot of patterns call for a chain 3.  You can use a chain 3 if you prefer.  I find that if I use a chain 2, my edges turn out nice and straight, and there isn’t a big annoying gap between the turning chain and the next double crochet.

 Each row has 174 stitches.

 Pattern uses a multiple of 4 plus 2 stitches.  This means that the number of single crochets in row 1, has to be divisible by 4, with 2 stitches leftover.

Pattern:

Row 1:  FDC 174 stitches. 
(or you can chain 175, and sc into the second chain from the hook and in every chain to the end to get 174 sc)

Row 2: Ch 2,  turn,  DC in next stitch and in each stitch to the end of the row .

Row 3:  Ch 2, turn,  dc in next stitch, * skip a stitch, shell in next stitch, skip a stitch, DC in next st *,  continue from * to *  until you have four stitches left, (including turning chain), skip a stitch, DC in last 2 DC and in top of the chain 2  of the turning chain

Row 4: Ch 2,  Dc in next 4 stitches,  * skip a stitch, shell in next stitch, skip a stitch, DC in next stitch *,  continue from * to * until you get to the last 5 stitches, skip a stitch, DC in last 3 stitches and in the top of the turning chain.


Starting with row 4, the double crochets are worked into the center DC of each shell, and the shells into the single DC.
Row 5-8:  Repeat rows 3 and 4. 

Row 9:  Ch  2, turn, DC in next stitch and in each stitch to the end.

Row 10:  Ch 1, turn, sc in first DC and in each stitch to the end.  End with a sc in the turning chain of row 9. 

Cut yarn, and weave in ends.

Note:  Pattern is untested, except by myself. Please let me know if something is unclear, or you find a mistake.
You may sell one or two items made from this pattern, but you may not sell the pattern or publish it anywhere else. Please link to the pattern if you post a picture elsewhere.

Monday, January 3, 2011

Quilting and Sewing WIPS

 Self designed quilted purse.  It's unfinished because I don't know what to do next.  Hopefully inspiration will strike one of these days.
 A Walk in the Woods quilt.  Pattern from the Stroll the block site.  I have 11 blocks finished and the 12th (and last block) is started.  Of course the blocks are only the beginning.  They need to be attached together, backed and quilted.
 Bird quilt.  Also from Stroll the Block.  The bird bath square is my own design and is from the walk in the garden quilt series on the same site.  I think I have 7 or 8 blocks done for this quilt. 
 Winter wall hanging.  I think this probably came from a magazine from Reiman publications, called Crafting Traditions.  It is no longer published.  This needs quite a bit of work,  The appliques need to be blanket stitched on, and it needs backing and quilting.
 Stroll the Block quilt.  This was a free block of the month pattern at HGTV quite a few years ago.  It needs a border, backing and needs to be quilted.  I do not believe that the pattern is there anymore.
Fall wall hanging.  Just needs some hand quilting done.  I believe that this was also a pattern from Crafting Traditions.

In addition to these, I have a bunch of snowmen blocks somewhere, (I love snowmen!),a half finished paper pieced wall hanging, featuring a lighthouse, and an assortment of pieced and paper quilted blocks that I made, just to try out various patterns.

Crochet Wips

I have tons of these, starting new projects is my specialty!

 Scrap tote, my own design. I was trying to use up odds and ends of yarn.  Just needs a top border and some sort of handles to be finished.
 63 squares heirloom afghan.  I have this mostly done.  I need to make a few more squares, and start sewing.  I started out making the pattern pictured,but I made squares from other sources as well.  This might be my oldest crochet WIP.
 Friendship afghan.  These 8 inch squares were sent to me by ladies on the Crochetville forum.  I have enough of them for a nice sized afghan, and have them all bordered.  I have sewn together three strips of 7 so far.
 This started out as a bottom up cardigan for me, but I know it won't get worn, so since so far it is just a rectangle, I will probably turn it into a baby blanket.  Its nice and soft, and the color is a lot brighter than it looks here.  The yarn is TLC Amore, which is not much fun to crochet with.
 A  sideways scarf.  I didn't like the pattern I was using, so I frogged it back to the first two rows.  Since I went to all the trouble of working into a long chain, (one of my least favorite things to do!), I am hoping to find another pattern that will work.
 Cool stripes hat, almost finished.  This is for one of my grandsons, and the third hat I've made from this pattern.  It's all single crochet, so it gets boring, but I like the end result.
 Simple lattice scarf.  This is my own pattern, and about the only thing that I could do with this yarn.  Its a very thin yarn, with tufts on it.
 Bernat CAL afghan.  I think this is quite possibly one of the ugliest patterns I've ever done.  I do plan to finish it, but I don;t know what I will do with it.  I have seen some finished versions of the pattern that looked really good, but I thought the Bernat example was unattractive, and so is this one.
 Granny Stripes afghan, pattern from the Attic 24 blog,  If you've never seen this blog, check it out, it's one of my favorites.  I will probably turn this into a toddler size blanket and donate it to the local pregnancy resource center.
 Crocheted mittens/fingerless gloves.  I like these, but I am thinking about frogging them.  I don't think I will use them, and all that single crocheting is tedious.
Cardigan for me.  This is my third attempt at a pattern in this booklet.  They are well written, and my gauge was right on, but even the smallest size turns out too big for me, (and I ought to be wearing  a bigger size than that!)  I am now using sportweight yarn and an F hook, for a pattern that calls for WW yarn and an H hook.  We'll see how it works out.

Knitting Wips

I am the world's slowest knitter.  I can do lots of stitches, but I'm awkward and I have to be really careful not to drop any, because I can't pick them back up properly.  Generally, I stick to the super simple patterns, but someday I would love to knit a sweater and a triangular lace shawl.

 My grandma knit slippers like these for us every year.  When I saw this pattern, I decided to make myself a pair.  They are pretty simple, but as I said, I am slow.
 Scrunchable Scarf.  Nice easy pattern, which uses only knit and purl stitches.
Garter Stitch Scarf:  the only thing I can do with this very soft and fuzzy yarn.  I was given two skeins of it, and am working on the second one.  I expect the scarf to be between 60 and 70 inches long when it's finished.


Learn to Knit Afghan from the book of the same name, by Barbara Walker.  My colors are two shades of  sage green, brown and  cream.
I am really tired of this one, so I'm going to quit at 49 squares and make a  throw. I have 9 or 10 squares left to make, and then all that tedious sewing together.....