Tuesday, January 2, 2018
Cait’s Messy Bun Hat
Monday, December 24, 2012
Ribbed Headband with Flower Trim
This is so easy that you still have time to make one of these for Christmas. I made this one is just a little over an hour.
WW yarn (I used Bernat Special Value yarn)
J hook
Yarn needle
Large button (optional)
Stitches used:
Ch (Chain)
DC (Double crochet)
HDC (Half double crochet)
FPDC (Front post double crochet)
BPDC (back post double crochet)
TC (Triple Crochet)
Even if you have never done post stitches before, you should be able to make this headband. Here is a link to an article from Crochet Today that explains how to do post stitches, and shows some of the lovely effects that can be achieved with them. (If you Google front or back post stitches, you'll find lots more tutorials for these stitches.)
Size: 4 inches wide by approximately 18 inches in diameter.
Can easily be modified to make larger or smaller.
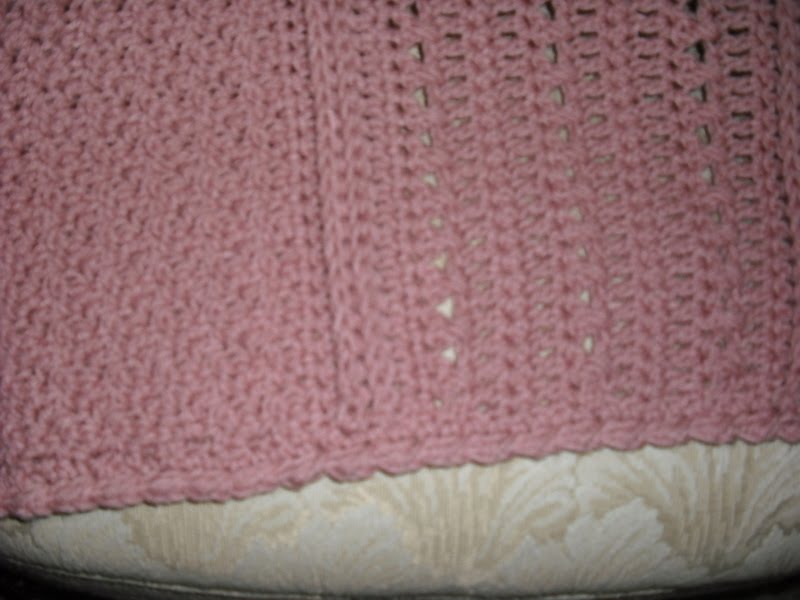
My headband is worked quite loosely so it is somewhat lacy in appearance. Using a smaller hook and working more tightly will create a more solid headband. You will need more rows to get enough length, and a longer beginning chain to make it as wide as mine. The pattern works with any uneven number of DCs in the first row. The stitch pattern could also be used to make a ribbed scarf.
Chain 15 fairly loosely.
1st row: DC in 3rd chain from hook and in each chain across. (13 DC) (Ist two chain count as a DC in this row.)
2nd row: Chain 2, (counts as first HDC here and throughout rest of pattern), turn, *FPDC in next stitch, HDC in next stitch* repeat from * to * to end of row, working last HDC into the turning chain. (7 HDC's and 6 FPDC's)
3rd row: Chain 2, turn, *BPDC in next stitch, HDC in next stitch*, repeat from * to * across, working last HDC into the turning chain
Notes: Each row has 13 stitches in it.
You will always BPDC into the previous rows FPDC and vice versa. All HDCs are made into the HDCs of the previous rows.
Repeat rows 2 and 3 until headband is long enough to fit around your head snugly. (I did 32 rows, all worked loosely, and my headband was about 18 inches long before I sewed the ends together.) Sew ends together.
Flower trim:
Chain 4, join with slip stitch to form a ring. *Chain 3, slip stitch into ring to form a loop*. Repeat from * to * 6 or 7 more times, making chain 3 loops around the outside of the ch 4 ring. (each loop will form a petal, and you can make any number of petals, I made 7)
Once you have your loops made, you will stitch into the loops to form petals.
Into each loop do: 1 SC, 2 HDCs, 2 DCs, 1 TC, 2 DCs, 2 HDCs, 1 SC . This will form a petal. In between each petal I slip stitched into the area between each loop, but I don't think this is necessary.
Sew flower to headband, using it to hide the area where you joined the ends. If desired sew a button to the center of the flower.
Alternatively, a row of large buttons or a felt flower would also be an effective and attractive way to hide the seam. (or maybe your sewing is better than mine and your seam looks good and doesn't need hiding!)
Wednesday, November 30, 2011
Ribbed Neckwarmer
Pattern is untested, except by myself. Please let me know if something is unclear, or you find a mistake.
You may sell one or two items made from this pattern, but you may not sell the pattern or publish it anywhere else. Please link to the pattern if you post a picture elsewhere.
Tuesday, February 8, 2011
Lilacs in February Baby Blanket
You may sell one or two items made from this pattern, but you may not sell the pattern or publish it anywhere else. Please link to the pattern if you post a picture elsewhere.
Saturday, January 22, 2011
January Snowday Scarf
January Snowday Scarf PDF
This is another very easy beginner friendly pattern. It can be made to any length and width, so this pattern would work for an afghan, a shawl, or a baby blanket as well.
Row 4: Ch 2, Dc in next 4 stitches, * skip a stitch, shell in next stitch, skip a stitch, DC in next stitch *, continue from * to * until you get to the last 5 stitches, skip a stitch, DC in last 3 stitches and in the top of the turning chain.
Starting with row 4, the double crochets are worked into the center DC of each shell, and the shells into the single DC.
You may sell one or two items made from this pattern, but you may not sell the pattern or publish it anywhere else. Please link to the pattern if you post a picture elsewhere.
Tuesday, December 14, 2010
Nate's Afghan
I apologize for my lousy photography. I could blame the gloomy weather, but the truth is that I have a hard time getting good pictures, even when the lighting is perfect.
First row:
Note: Pattern is untested, except by myself. Please let me know if something is unclear, or you find a mistake.
You may sell one or two items made from this pattern, but you may not sell the pattern or publish it anywhere else. Please link to the pattern if you post a picture elsewhere.
Sunday, November 7, 2010
Easy Baby Shoes
Note: Pattern is untested, except by myself. Please let me know if something is unclear, or you find a mistake.
You may sell one or two items made from this pattern, but you may not sell the pattern or publish it anywhere else. Please link to the pattern if you post a picture elsewhere.
PDF Download
Tuesday, May 4, 2010
May Day baby Blanket
This is a relatively easy blanket, which I think should be achievable by an advanced beginner. It takes a little practice to get proficient at the crossed doubles, (mostly just figuring out which is the next stitch to skip, since the crossed Dc pulls the stitches that they have been worked into, close together), but once you get it, they are easy.
This blanket can be adapted to be a full size afghan or it can be made smaller. See end of pattern for some ideas on how to change the size.
Gauge: unimportant
I crochet somewhat loosely. My blanket will be about 42 inches square.
Materials:
WW yarn, (I used 26-28 oz of yarn.)
Crochet hook size K
Yarn needle for weaving in ends
Any yarn will work, just use an appropriately sized hook, size will vary with yarn used.
Stitches used:
St-stitch
ch-chain
sc-single crochet
dc-double crochet
Crossed doubles
fpdc-Front post double crochet (instead of working into the top of the dc in the previous row, you work around the post of the stitch from the front of it)
bpdc-Back post double crochet (same as above, but you are working the stich from the back of the post of the dc from the previous row)
Front and back post stitches form what I call “fake cables” or ridges on the front of your work. I like them because they are an easy way to add some texture and interest to crocheted fabric.
Note that all rows will have 120 stitches in them. The afghan is made in one piece. However, I have divided the pattern into sections to make it a little easier to keep track of. Do not end off at the end of a section, keep crocheting onto the next one. The afghan is made as follows:
section 1, section 2, section 1, section 2, section 1.
Pattern:
Chain 121.
Section 1:
Row 1: sc in second chain from hook and in each chain across. (120 sc) this is the right side)
Row 2: ch 2 (always counts as first dc), dc in each stitch across.
Row 3: ch 2, bpdc in each st across until you reach the turning ch, dc into top of turning ch
Row 4: ch 2, fpdc in each st across until you reach the turning ch, dc into top of turning ch
Row 5: ch 2, dc in each st across, last stitch will be into the top of the turning ch
Row 6: Ch 2, * skip a stitch, dc into the next stitch. Now, working around the stitch you just made, dc into the skipped stitch. (your crochet hook will be in front of the dc you just made)* (These two stitches made one set of crossed doubles) repeat from * to * until you get to the turning chain. Dc into the top of the turning chain.
Row 7: Repeat row 2, finishing with a dc in the top of the turning chainrow)
Row 8: ch, sc in each st across, finishing with a sc in top of turning ch
Row 9. Repeat row 7. (it’s a DC row)
Row 10: Repeat row 6. (crossed doubles)
Row 11 –13: Repeat rows 7 to 9.
Row 14: Repeat row 6. (crossed doubles)
Row 15: Repeat row 8. (sc row)
Row 16: repeat row 2. (double crochet row)
Row 17: repeat row 3. (bpdc row)
Row 18: repeat row 4 (fpdc row)
Row 19: repeat row 8 (sc row)
Section 2:
Rows 20-32: ch 1, sc in first st, dc in next st, *sc in next st, dc in next st * repeat from * to * to end of row (end this section with a wrong side row)
The rest of the afghan is repeats of the previous sections.
Rows 33-51: repeat section 1
Row 52 to 64: repeat section 2
Rows 65-81: repeat section 1
Do not cut yarn. Work a sc border all around the blanket, placing 3 sc into each corner and spacing stitches evenly across the ends of the rows. I try to make the same number of stitches in each end, so that the finished blanket turns out nice and even. I finished with a row of reverse HDC. (*HDC in a stitch, ch 1, skip a stitch* and repeat from *to*) worked all around but from left to right, rather than the usual right to left. This makes a nice rope like border.
This blanket can easily be made larger or smaller. Start with an even number of sc in the first row.
To make it wider, you could either add panels, add more rows to section 2, add some extra rows into one of the panels, or make up additions of your own.
I purposely didn’t add any very lacy stitches, because I wanted the finished product to be suitable for either a boys or a girls blanket.
Pattern is untested, except by myself. Please let me know if something is unclear, or you find a mistake.
You may sell one or two items made from this pattern, but you may not sell the pattern or publish it anywhere else. Please link to the pattern if you post a picture elsewhere.
Wednesday, February 17, 2010
Market Bag
This is a small size market bag that I made to use up some leftover WW cotton yarn. Laying flat, mine measures about 14 inches wide, by 15 inches long, excluding the handles. it is quite stretchy, so it will hold a fair amount.
Materials:
WW cotton yarn:
I used approx 6 - 7 oz variegated (it was the last of one of those 14 oz skeins of peaches and cream) and 2 oz. or so of a co-ordinating plain color
G and H hooks
4 stitch markers
yarn needle
Stitches used:
ch - chain
sc - single crochet
dc - double crochet
Starting with variegated yarn and H hook:
ch 40.
Row 1: Sc in second ch from hook and in each ch across. (39 sc) Ch 1, turn.
row 2-10: SC in each ch across. (39 sc in each row) Ch 1 turn.
You will now begin working in rounds.
Row 11 and Round 1: Sc in each st across. When you reach the end of the row, turn work so that you can sc across the ends of the 11 sc rows. Do not ch 1. Do one sc in the end of each row. (11 sc) when you get to the other side, sc in the loose loops of the beginning chain. (39 sc) Make a sc in the other ends of the 11 sc rows. Join to the first sc of the round.
Round 12 - 15: Ch 1, Sc in each stitch around, join the stitches of each round to the beginning sc of that round. You should have 100 sc.
(Don't worry if you don't. As long as you have an even number of stitches when you get to the mesh part, the pattern will work. Actually, for that matter, you can always fudge a little in the first row to make it work, its only a market bag after all!)
If you want a larger solid bottom, just do more sc rounds, until the solid part is a high as you want it. I would probably have done more if I wasn't worried about running out of yarn.
Start mesh pattern, continue to work in rounds:
Round 16: Ch 4, (counts as first dc plus ch 1), skip a stitch, *DC in next st, ch 1. Skip a stitch * repeat from * to * around, join in third st of the beginning ch 4, slip stitch into the space created by the ch 4. (I don't know quite how to write that, it would be like slip stitching into the ch 1 space)
round 17-32: Ch 4, DC into next ch 1 space, ch 1, *DC into next ch 1 space, ch 1*, repeat from * to * around, join into 3rd ch of beginning ch 4, slip stitch into space created by the ch 4.
Again, you can add more rounds here to make the bag taller.
round 33-35:
Ch 1, sc in each stitch around, join to beginning st
Fasten off.
Start handles:
Lay your bag down flat and mark the stitch on each side. Count out 12 stitches on either side of this stitch and place a marker in each of them. This should give you 25 stitches front and back between the markers.
Join contrasting yarn at a marker.
round 1: Sc from that marker around the side of the bag to the next marker. Ch 30. Skip the 25 stitches on the flat side of the bag, (it will be either the front or back depending on where you joined your yarn.) Sc into the next marked stitch and continue to the next marker. Ch 30 to make the other handles and join to the beginning sc with a slip stitch.
Round 2 - 6- Ch 1, sc in joining stitch and in each st and chain around (110 sc) Again it doesn't really matter if you have a different number of stitches.
At the end of round 6 fasten off.
Still using the H hook, do a round of SC around the inside (circle part) of the handles.
Using a G hook, do a round of sc around the inside of the handles and around the top of the bag. I found that using a smaller hook for this made a slightly less stretchy handle.
Fasten off, weave in ends.
Once you have made one of these bags, you will find it very easy to make a larger bag using the same general idea.
Pattern is untested, except by myself. Please let me know if something is unclear, or you find a mistake.
You may sell one or two items made from this pattern, but you may not sell the pattern or publish it anywhere else. Please link to the pattern if you post a picture elsewhere.
Wednesday, December 16, 2009
Ashlea Scarf
This is a very easy scarf pattern. Although the lacy stitch pattern looks a little complicated, it uses only chains, and single and double crochet stitches. Once you establish the pattern, it is only a simple one row repeat, which is easy to memorize. It is simple to make this design wider or narrower, and I think it would make a pretty shawl also.
Notes:
I used WW weight yarn and a K hook. The stitch pattern is quite dense in places, so it drapes better if you use a hook that seems a little large for the yarn. I crochet loosely.
This pattern uses a stitch multiple of 4 plus 1. Then you add 3 more to your beginning chain for the turning chain. (which in this case means that your beginning chain has to be a multiple of 4.) This means that you could make a narrower scarf by subtracting 4 stitches or make a wider scarf or a shawl, by adding stitches in multiples of 4.
My scarf turned out to be 7 inches wide. If I made it again, I might make it a little narrower, but this scarf is going to a "warm the homeless project" that was organized by one of my co-workers so the width will be welcome for warmth.
Stitches used:
ch: chain
dc: double crochet
sc: single crochet
Special stitches:
cluster: 1 dc and 1 sc both in same chain or stitch
v stitch: 1 dc, ch1, 1 dc all done in the same chain or stitch
V stitch in v stitch means that you make a v stitch in the chain 1 space of the v stitch in the previous row.
The chain 3 that starts each row is there to give the scalloped effect along the edge of the scarf and is not used as a working stitch. Just ignore it when you get to the end of the row. The last cluster is worked into the last actual stitch of the row, not the turning chain.
The Pattern:
Chain 20. Remember to use a hook that is a couple of sizes larger than the yarn calls for, so that your scarf will drape nicely.
Row 1: Make cluster into the 4th ch from the hook), **skip a ch, v stitch in the next ch, skip a chain, cluster into the next ch**, repeat from ** to **. You should end with a cluster in the last chain. Ch 3, turn
Row 2: Skip the first sc, make a cluster in the next st, (which is the dc of the cluster below),
**v stitch into the v stitch below, cluster into the DC of the cluster below**, repeat from ** to **, ending with a cluster in the last DC of the last cluster. Do not stitch into the ch 3 turning chain.
ch 3, turn.
Repeat row 2 until your scarf is as long as you want it to be.
The pattern consists of clusters worked in the DC of the clusters in the row beneath alternating with v stitches worked in the chain 1 space of the v stitch in the previous row.
If you don't want the scalloped edge, using a ch 2 as a turning chain will make the edge straighter. If you choose this option, you would need to subtract one chain from the beginning chain.
Pattern is untested, except by myself. Please let me know if something is unclear, or you find a mistake.
You may sell one or two items made from this pattern, but you may not sell the pattern or publish it anywhere else. Please link to the pattern if you post a picture elsewhere.
Friday, November 13, 2009
Christmas Coasters
I call these Christmas coasters because I used variegated yarn in red, white and green, but they don't have to be festive.
This could also be used as a decoration for a purse, or a hat.
Mine turned out to be just slightly over 4 inches from point to point.
Materials:
WW yarn (I used cotton)
size I hook
Yarn needle
Stitches used:
ss- slip stitch
ch- chain
sc- single crochet
Hdc- half double crochet
dc- double crochet
trc- triple crochet
Pattern:
Ch 3 and join with SS to form ring.
Round 1: Ch 3, (counts as a DC) and make 11 more DC in ring, join with ss to top of beginning ch 3. (12 dc)
Round 2: Ch 1, sc in same stitch as join. ch 1, sc in next st, ch 4, *sc in next st, ch 1, sc in next st, ch 4*. repeat from * to * around ending with ch 4. ss into top of first sc. You should have 6 ch 1 spaces and 6 ch 3 spaces.
Round 3: Ss into the first ch 1 space, *into the next ch 3 space work sc, hdc, dc, trc, dc, hdc, sc, ss into next ch 1 space*. repeat from * to * around, end with ss in top of first ss.
Fasten off and work in ends.
Pattern is untested, except by myself. Please let me know if something is unclear, or you find a mistake.
You may sell one or two items made from this pattern, but you may not sell the pattern or publish it anywhere else. Please link to the pattern if you post a picture elsewhere.
Monday, October 19, 2009
Crocheted Lattice Clothes Hanger Cover
Covered hangers keep your clothes from sliding onto the floor. This is easy to customize to any plastic hanger.
WW yarn
Size G hook
Plastic clothes hanger
Yarn needle
Stitches used:
SS - slip stitch
Ch – chain
Dc – Double crochet
The beginning ch 2 represents a DC. All rounds are joined with a ss to the 2nd ch of the beginning ch.
I chain loosely, so I use a ch 2 to represent a DC in this pattern. If you wish, you can use a ch 3 to represent the beginning DC of each round. You will have to add a chain at the beginning of every round and join each round to the third chain of the beginning chain.
This pattern is a lattice design worked in rounds. Each round has 8 DC in it, and they are separated by spaces made of varying numbers of chains in order to make the cover fit around the hanger.
To begin each new round after round 2, ss to the next ch space.
Keep trying the cover on the hanger you are making it for and add chains as needed for the cover to fit. The fit should be snug.
It took 13 rows to cover the hanger I used. I have two different brands of plastic hangers, but they are almost exactly the same size.
PATTERN
This pattern covers half the hanger, so you will need to make 2.
Ch 4, join into ring with SS.
Round 1:
Ch2, Dc into ring, Ch 1, + 2 DC into ring, ch 1 +, repeat x 2 from + to +. You should have 8 DC and 4 ch 1 spaces.
Round 2:
Ss to space between first 2 dc, ch 3, + Dc into next space, ch 1 +, repeat from + to + around, join
Round 3 and 4:
Ss to ch 1 space, ch 3, +dc into next ch 1 sp, ch 1+, repeat from + to + around, join.
Round 5 to 7:
Work same as rounds 3 and 4, but increase every other chain space to 2 chains.
You will have 8 dc’s with 8 spaces, 4 will be ch 2 spaces, 4 will be ch 1 spaces.
Rounds 8 to 10:
Work same as round 5, except increase every chain space between the dc’s to 2 chains.
You will still have 8 DC’s and you will have 8 ch 2 spaces.
Rounds 11-12:
Work same as previous rounds, but increase every other ch space to 3 chains.
Round 13:
Work same as previous rows, but increase each ch space to 3 chains.
If this is too small for your hanger, just continue in pattern, adding chains to the spaces as needed for your hanger. Keep trying it on the hanger as you make the cover.
Make another half the same and fit them over the clothes hanger. Sew together down the middle. I sewed all the Dc’s together. I just wove the yarn through the chains to get to the next pair of DC’s.
Alternatively, you could tie the two halves together on both sides of the hanger, at the top and bottom with yarn or ribbon. This would make it easier to remove the cover at a later time if you wanted to.
Pattern is untested, except by myself. Please let me know if something is unclear, or you find a mistake.
You may sell one or two items made from this pattern, but you may not sell the pattern or publish it anywhere else. Please link to the pattern if you post a picture elsewhere.
Saturday, October 17, 2009
Shell Baby Booties
Shell Baby Booties
Size: sole is about 4 inches long
WW yarn
H hook
Ribbon (optional)
Stitches used:
Ch – chain
Ss – slip stitch
Hdc – Half double crochet
Dc – Double crochet
Sc – single crochet
Pattern:
Beginning chain counts as a stitch.
Round 1:
Ch 3, 7 HDC in 3rd ch from hook, join to top of beginning ch. (8 HDC)
Round 2:
Ch 2, Hdc in same st, 2HDC in each st around, join to top of beginning ch. (16 HDC)
Rounds 3 to 6:
Ch 2, Hdc in each st around. (16 Hdc)
Start working back and forth in rows. 4 stitches in the round will be left unworked.
Row 7:
Ch 2, Hdc in the next 11 stitches. (12 Hdc)
Row 8 and 9:
Ch 2, turn, Hdc in each st around (12 Hdc)
Row 10:
Ch2, turn, Hdc in next st, HDC 2 together 4 times, Hdc in last 2 stitches (8 HDC)
Now you will again work in rounds.
Round 11:
ch 1, turn.
You will be working along the ends of the rows just completed.
Make 6 sc evenly spaced across the ends of rows 7 to 10.
Sc in the 4 stitches left unworked from round 6, then make 6 more sc evenly spaced along the other ends of rows 7 to 10.
Join with a ss to the first sc on the other side. You will have a bootie shape with a slit in the heel. (16 sc)
Round 12:
Ch 2, HDC in each st around Join with SS to top of beginning ch 2. (16 HDC)
Round 13:
(eyelet row)
Ch 3, skip a stitch, + Hdc in next st, ch 1, Skip a stitch + repeat from + to + around , join with SS to top of beginning ch (8 ch 1 spaces)
Round 14:
SS to a ch 1 space, ch 3, 2 dc in same space, make a 3 dc in each of the other ch 1 spaces, join with ss to top of beginning ch 3.
Fasten off, leaving a tail long enough to weave down to the slit in the heel and sew it up.
Weave in ends. Thread a length of ribbon through the eyelets, or make a crocheted chain to use for a tie.
These booties can be made smaller by omitting a round, or larger by adding a round or row. They can be made taller by adding a row of sc or another shell row at the end.
You may sell one or two items made from this pattern, but you may not sell the pattern or publish it anywhere else. Please link to the pattern if you post a picture elsewhere.