I made both these pairs of booties last week Friday, in order to avoid doing anything more ambitious, like housework.
The lilac colored ones are knit from this pattern. I used WW yarn, (Caron Pounder leftover from the doily ghan and the Lilacs in February blanket), and size 6 needles, and they are about 6 month size.
The green crocheted booties are this pattern. The yarn is Red Heart Soft, and I used a G hook.
Both pairs of booties will be donated.
Monday, March 28, 2011
Thursday, March 17, 2011
Doily Style Baby Blanket
This is made out of the same yarn as the Lilacs in February blanket. I had purchased an extra skein (Caron Pounder in lilac), in case I needed it to finish that blanket. I didn't use it, so I decided to make another blanket out of it. I ended up needing more than 16 oz of yarn for this blanket, so I had to buy another skein. Of course I still have most of that last skein left, so now I will have to think of something else to make out of it. I made up this pattern as I went along, but so far I've only written out the first 15 or so rows. I'm not sure that this will ever become a written pattern, since it required such a lot of ripping out and re-doing in order to get it to lay flat. As is the case with most of the baby things I make, this will be donated to the local pregnancy resource center.
My original plan was to make a fancy border for this blanket, but by the time I finished the petal section, it was already 40 inches in diameter. So I finished it off with a very simple scalloped border instead.
Baby Shoes
I thought it would be fun to make baby shoes for donation to the local pregnancy resource center. With that in mind, I found this pattern and hunted through my fabric stash. The finished shoes are cute, but the pattern is rather carelessly written and my first attempt did not go well. However, I did manage to make these little shoes this morning. I'm not sure that I will attempt these again, although I may look for other baby shoe patterns to try.
Tuesday, February 8, 2011
Lilacs in February Baby Blanket
This is a very easy pattern, suitable for an advanced beginner. The hardest parts of it are evenly single crocheting along the sides for the first round of the border, and the reverse HDC round that finishes it.
Materials:
WW yarn 16 oz (I used a Caron pounder in lilac, and only had about 5 yards of yarn left so you may need more.)
K hook
Yarn needle for weaving in ends
Special stitch:
Cluster (worked over two stitches) – yarn over hook, insert hook in first stitch, pull up loop, yarn over hook again, insert hook in next stitch, pull up loop, yarn over hook and pull through all 5 loops on hook-1 cluster stitch made
Abbreviations:
Ch - -chain
Sc – single crochet
Dc – double crochet
Ss – slip stitch
Hdc – half double crochet
Note:
Pattern works on any even number of stitches, so you can make a blanket of any size. You could also make a scarf or a rectangular shawl from this pattern.
Gauge:
Unimportant.
My blanket is 36 inches square
Pattern:
Chain 85.
Row 1: Sc into second chain from hook and into each chain to the end (84 sc)
Alternatively, you could foundation single crochet 84 stitches.
Row 2: Ch 2, turn, DC into next stitch, * cluster over next 2 stitches, ch 1 *, repeat from * to * until you have two stitches left, DC into the last two stitches (84 stitches)
Row 3: ch 1, turn, sc into each double crochet, into the top of each cluster and into every chain stitch across (84 sc)
Repeat rows 2 and 3 for a total of 73 rows. End with row 3.
Do not finish off. Work border as follows.
Border:
Round 1: Ch 1, and do a round of sc around the entire afghan, placing 84 sc down each side and across top and bottom, and 3 sc into each corner. Join with a ss to beginning sc.
Don’t get too hung up on getting the stitch count exactly right. As long as you have an even number of stitches the pattern will work out. And if despite your best efforts, you happen to miscount and end up with an extra stitch, you can still make it work out.
Round 2: (work loosely) SS to corner stitch, ch 2, dc into same stitch, ch 1 and work 2 more dc’s into the same stitch, * cluster stitch worked over next two stitches, ch 1 *, repeat from * to * until you get to the next corner, into next corner stitch work 8 2 DC, ch 1, 2 DC *, all into the same corner stitch, and then continue with cluster stitch, ch 1 down the next side. Repeat around until you get to the beginning ch 2. Join with ss.
Note: If you ended up miscounting and end up with an extra stitch, just skip a stitch in the middle of a cluster stitch. It will barely show in the finished blanket, and it’s a lot easier than ripping out what you’ve already accomplished.
Round 2 makes a series of eyelets that you could weave a ribbon through if you were so inclined.
Round 3: Reverse HDC row
If you’ve never done this before it might take a bit of trying to get it, but once you do, you’ll be happy you did. This stitch makes an edge that looks a little like a twisted rope. I use it a lot for afghans, because I think it really makes the project. If you don’t want to bother, there’s nothing wrong with another row of SC to finish.
And I suppose if you are a glutton for punishment, you could do reverse sc. That just means you sc in every stitch, but you work backwards. It’s a lot harder on your hands and takes a lot longer than the reverse HDC, but it also looks really nice.
As you might expect from the name, reverse HDC is worked in the opposite direction that you would usually work in, from left to right, rather than from right to left. (I’m right handed, I’m not sure what direction a left handed crocheter would ordinarily work in)
And finally, here’s how to work the stitch, remember to work in the “wrong” direction:
To start: ch 2, HDC into the first ch 1 space, (which should be before a cluster), ch 1, HDC into next ch 1 space. Continue across, working a HDC into each ch 1 space, with a ch 1 between each HDC. When you get to the corner, work a HDC into each DC, skipping the ch 1 in between the two sets of DEC’s. (4 HDC’s going around each corner) Continue around until you get to where you started. Join to the beginning ch 2. I usually pull the yarn through a stitch, rather than slip stitching. Whatever looks best to you is fine.
Cut yarn and weave in ends.
Essentially reverse HDC is just a series of * HDC, ch 1 * worked backwards. Each new HDC twists around the last set of stitches, creating a twisted looking border. Rather than “standing up” the HDCs are “laying down” along the edge of the blanket. I find that it sometimes takes a little finagling to make the corners look nice. In this case I did a HDC into each of the 4 DC’s in the corners, and skipped the ch 1 in the middle of the DC’s. This picture will give you an idea of what the reverse HDC edge looks like.
You may sell one or two items made from this pattern, but you may not sell the pattern or publish it anywhere else. Please link to the pattern if you post a picture elsewhere.
Thursday, February 3, 2011
I've finished one of my WIPS
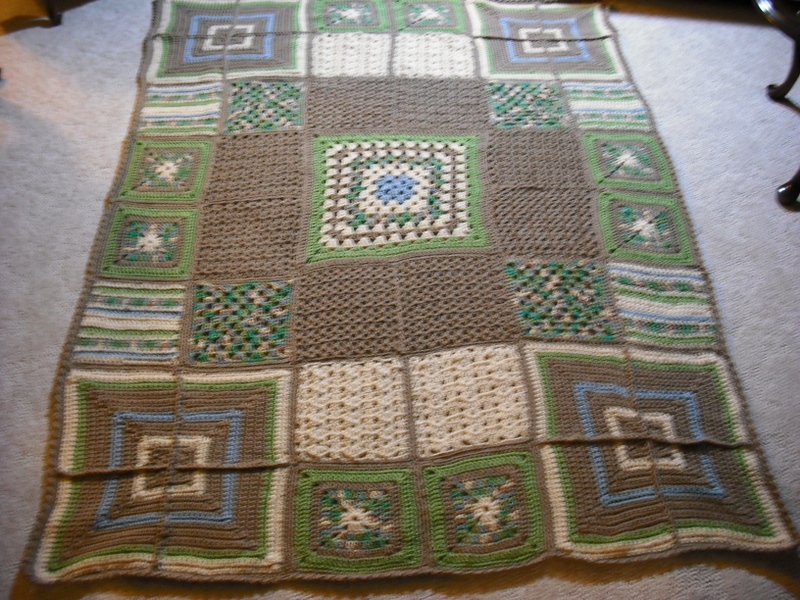
I finally finished the Bernat mystery afghan today. I have to say honestly that I don't like it at all. I don't think that the pattern is at all worthy of a professional designer (or at least I assume that Bernat has professional designers). If I were a beginner crocheter and tried this as one of my first projects, I'd choose another craft. However, here it is. My photograph is worse than usual, but my subject isn't all that great either.
Wednesday, February 2, 2011
Snow-Snow-Snow!!
According to the news stations around here, the snowstorm we had last night and this morning, was record breaking. Now, evidently, they only meant record breaking for Feb 2nd. Apparently the record is some paltry bit of snow, 2.1 inches, is what I heard on one station. Never-the-less, we got a lot of snow in the past 24 hours. I'd guess its somewhere between 15 and 18 inches, on top of what we already had.
Looking out the front door
Snow piled on the table on the back deck
This last picture is our front yard, taken from the family room window.
Once it stopped snowing, the sun came out and it was bright and cheerful. And this evening, when I decided to take these pictures, I noticed the end of a pretty sunset. It's hard to believe that in only a few months, it will be spring, and pretty soon, I'll be complaining about the heat!
Looking out the front door
Snow piled on the table on the back deck
This last picture is our front yard, taken from the family room window.
Once it stopped snowing, the sun came out and it was bright and cheerful. And this evening, when I decided to take these pictures, I noticed the end of a pretty sunset. It's hard to believe that in only a few months, it will be spring, and pretty soon, I'll be complaining about the heat!
Saturday, January 22, 2011
January Snowday Scarf
Updated Sept, 2014
January Snowday Scarf PDF
This is another very easy beginner friendly pattern. It can be made to any length and width, so this pattern would work for an afghan, a shawl, or a baby blanket as well.
January Snowday Scarf PDF
This is another very easy beginner friendly pattern. It can be made to any length and width, so this pattern would work for an afghan, a shawl, or a baby blanket as well.
Ordinarily I wouldn’t make a scarf that is worked lengthwise, because I hate working into a long chain. I saw a scarf pattern that I really liked, started it, and lost the pattern. It seemed a shame to frog what I had already done, so I decided to see what I could come up with. This is the result.
My scarf is about 6.5 inches wide and 84 inches long.
Materials needed:
WW yarn – I started with a 10 oz skein of Bernat Rainbow Dreams, and had some left over. I’d estimate that I used between 7 and 8 ounces of yarn.
K hook
Yarn needle to weave in ends
Of course you could use any yarn with an appropriately sized hook. I used a larger hook than I might ordinarily use with WW yarn, because I wanted the resulting scarf to drape nicely. If I was making a blanket, I probably would have used an I or a J hook.
You can easily adjust the length of this scarf by changing the number of stitches in the beginning chain or foundation row.
Stitches used:
Foundation single crochet (optional) - FDC
Ch - chain
Single crochet - SC
Double crochet - DC
Special stitch: shell = 3 DC into same stitch
Notes:
This scarf is worked back and forth in long rows. It has nice straight edges and square corners. (my picture taking skills don’t really reflect this very well.)
I have not yet tried it as a scarf worked in short rows, but it should work. Just start with a smaller beginning row, say something like 26 or 30 single crochet stitches in row 1, depending on the width you want. I do not think it will drape as nicely made this way.
Beginning ch 2, (turning chain), counts as the first DC of each row. I like to use a chain 2 to represent a double crochet, but a lot of patterns call for a chain 3. You can use a chain 3 if you prefer. I find that if I use a chain 2, my edges turn out nice and straight, and there isn’t a big annoying gap between the turning chain and the next double crochet.
Each row has 174 stitches.
Pattern uses a multiple of 4 plus 2 stitches. This means that the number of single crochets in row 1, has to be divisible by 4, with 2 stitches leftover.
Pattern:
Row 1: FDC 174 stitches.
(or you can chain 175, and sc into the second chain from the hook and in every chain to the end to get 174 sc)
Row 2: Ch 2, turn, DC in next stitch and in each stitch to the end of the row .
Row 4: Ch 2, Dc in next 4 stitches, * skip a stitch, shell in next stitch, skip a stitch, DC in next stitch *, continue from * to * until you get to the last 5 stitches, skip a stitch, DC in last 3 stitches and in the top of the turning chain.
Starting with row 4, the double crochets are worked into the center DC of each shell, and the shells into the single DC.
Row 5-8: Repeat rows 3 and 4.
Row 9: Ch 2, turn, DC in next stitch and in each stitch to the end.
Row 10: Ch 1, turn, sc in first DC and in each stitch to the end. End with a sc in the turning chain of row 9.
Cut yarn, and weave in ends.
You may sell one or two items made from this pattern, but you may not sell the pattern or publish it anywhere else. Please link to the pattern if you post a picture elsewhere.
Subscribe to:
Posts (Atom)